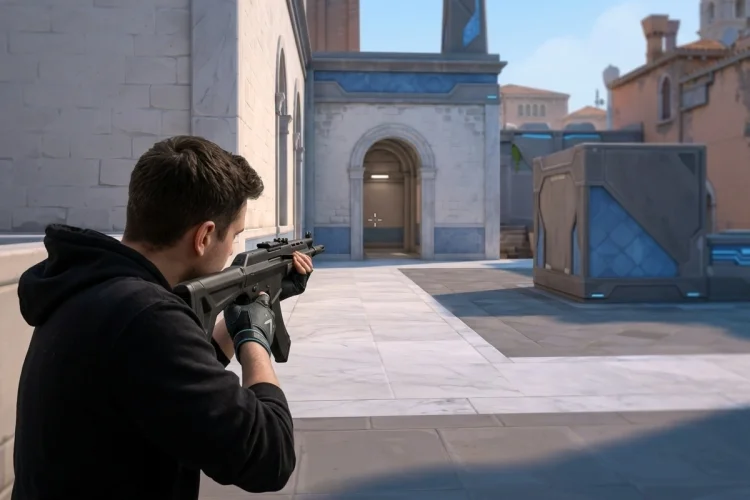
A smooth frame rate will not magically turn every shot into a headshot, but it can make aiming feel far more responsive.
In a tactical shooter like VALORANT, even a small stutter can make tracking an opponent, holding an angle, or reacting to a quick peek much harder than it should be.
The good news is that VALORANT is designed to run on a wide range of computers. Riot’s official requirements include separate hardware targets for 30 FPS, 60 FPS, and 144 FPS or higher, so you do not necessarily need an expensive gaming PC to enjoy responsive gameplay.
However, using the wrong combination of graphics, latency, mouse, and crosshair options can still hurt performance. This guide covers the best Valorant settings for maximum FPS and better aim, with practical recommendations for competitive players and beginners.
Treat these settings as a strong starting point, then adjust them based on your hardware, monitor, and personal aiming style.
Recommended Valorant Settings at a Glance
The following setup prioritizes visibility, stable performance, and low input latency rather than visual detail.
| Setting | Recommended Option |
|---|---|
| Display Mode | Fullscreen |
| Resolution | Native resolution |
| Multithreaded Rendering | On |
| Material Quality | Low |
| Texture Quality | Low |
| Detail Quality | Low |
| UI Quality | Low |
| Vignette | Off |
| VSync | Off |
| Anti-Aliasing | None or MSAA 2x |
| Anisotropic Filtering | 1x or 2x |
| Improve Clarity | Off or personal preference |
| Bloom | Off |
| Distortion | Off |
| Cast Shadows | Off |
| NVIDIA Reflex Low Latency | On |
| Scoped Sensitivity Multiplier | 1.0 |
| Crosshair Movement Error | Off |
| Crosshair Firing Error | Off |
These options are not mandatory. A powerful PC may maintain high frame rates at medium or high settings, while an older laptop may benefit from lowering the resolution as well.
Use Fullscreen Mode and the Correct Resolution
1. Display Mode: Fullscreen
Fullscreen is generally the best display mode for competitive play. It allows the game to take priority on the display and helps reduce distractions from desktop applications.
Windowed and borderless modes are convenient when frequently switching between programs, but convenience is less important during a competitive match. Start with Fullscreen and only change it when you experience a specific problem.
2. Resolution: Use Native Resolution First
Most players should begin with their monitor’s native resolution, such as 1920 × 1080. Native resolution usually provides the clearest image, making distant character models, crosshair placement, and environmental details easier to read.
Lowering the resolution can improve FPS when the graphics card is the main performance limit. For example, a low-end system may perform better at 1600 × 900 or 1280 × 720.
Do not lower the resolution simply because professional players use unusual settings in other shooters. VALORANT does not provide the same character-model stretching benefits associated with certain older competitive games.
Use the resolution that gives you a clear image and a stable frame rate.
Lower Graphics Quality for Maximum FPS
VALORANT’s colorful visual style still looks clean at low settings. Reducing quality mainly removes extra detail and effects that are not essential for competitive gameplay.
Set Material Quality, Texture Quality, Detail Quality, and UI Quality to Low when maximum FPS is the priority. Texture Quality can sometimes remain at Medium on systems with enough video memory, but it rarely provides a meaningful competitive advantage.
Turn off Vignette, Bloom, Distortion, and Cast Shadows. These effects can make the game look more cinematic, but they may add visual clutter or consume system resources.
For Anti-Aliasing, begin with None for the highest possible frame rate. Try MSAA 2x when jagged edges make distant enemies difficult to identify. The small visual improvement may be worth a minor performance cost on a mid-range PC.
Keep Anisotropic Filtering at 1x or 2x for maximum performance. Higher values make textures appear sharper at certain viewing angles, but the difference is less important than stable frame delivery during gunfights.
Enable Multithreaded Rendering
Multithreaded Rendering should normally be enabled when the option is available. It allows VALORANT to distribute rendering work across multiple CPU threads, which can improve performance in scenes containing many visible objects.
Riot has specifically described benefits in visually busy areas and situations where rendering workload becomes significant.
Riot’s support documentation recommends at least 8 GB of RAM, 2 GB of video memory, and a processor with eight logical or physical cores to make effective use of the setting. The option may not appear on every computer.
Test the Practice Range with the feature both enabled and disabled when using older hardware. Keep the option that produces the most stable frame rate rather than choosing solely based on the highest number shown for a few seconds.
Reduce Input Latency With Reflex and VSync Settings
1. NVIDIA Reflex Low Latency
Players with a supported NVIDIA graphics card should enable NVIDIA Reflex Low Latency. Reflex synchronizes CPU and GPU rendering work to reduce the time between an input and the resulting image appearing on the screen.
Begin with On. You can test On + Boost when available, especially if your GPU frequently changes clock speeds or is operating near full utilization. Boost may increase power consumption, so laptop users should monitor temperature and battery use.
NVIDIA reports that Reflex can substantially reduce PC latency in VALORANT under supported hardware and test conditions. Actual improvements will vary depending on the processor, graphics card, frame rate, and whether the system is CPU- or GPU-limited.
2. VSync
Set VSync to Off for competitive matches unless screen tearing is severe enough to distract you. VSync synchronizes frames with the monitor’s refresh cycle, but competitive players generally prioritize immediate input response.
Also check that Windows is actually using your monitor’s maximum refresh rate. Owning a 144 Hz or 240 Hz display does not help much when the operating system is still configured to output at 60 Hz.
NVIDIA’s latency optimization guide specifically recommends enabling the monitor’s highest supported refresh rate.
Choose a Stable FPS Limit
VALORANT provides separate FPS limiters for menus, background activity, battery use, and active gameplay. Limiting menu and background FPS can reduce unnecessary heat and power consumption without affecting matches.
For active gameplay, there are two reasonable approaches. Leave the frame rate uncapped when you want the lowest possible latency and your system remains stable. Alternatively, cap it at a number your PC can maintain consistently.
For example, a computer that fluctuates between 170 and 260 FPS may feel smoother with a limit around 180 or 200 FPS. A system that constantly drops below its target can produce inconsistent frame times, even when the average FPS looks impressive.
Do not automatically cap the game at exactly the monitor refresh rate. Rendering more frames than the display can show may still reduce the age of the frame presented on screen, although it can increase heat, power use, and screen tearing.
Find the Right Mouse Sensitivity
There is no universal “best” Valorant sensitivity. The right value should let you make small head-level adjustments while still turning comfortably when an opponent appears from the side.
A useful measurement is effective DPI, commonly shortened to eDPI:
Mouse DPI × In-Game Sensitivity = eDPI
For example, 800 DPI multiplied by 0.35 sensitivity equals 280 eDPI. This is a practical starting point for players who want a low-to-medium sensitivity without making large turns feel impossible.
Try a test range of approximately 200 to 400 eDPI, then adjust gradually. Do not copy a professional player’s sensitivity and expect identical results because mouse weight, grip style, desk space, and arm movement all matter.
Keep the Scoped Sensitivity Multiplier at 1.0 initially. This makes scoped movement easier to understand and keeps your setup simple. Change it only after you can clearly identify a problem with your scoped aim.
Avoid changing sensitivity every day. Muscle memory develops through consistency, so use one setting for several practice sessions before deciding whether it is too fast or too slow.
Create a Simple, Static Crosshair
The best Valorant crosshair is easy to see without covering an opponent’s head. Bright colors such as cyan, green, white, or yellow usually remain visible across most map backgrounds.
Use a small static design with thin inner lines. Turn Movement Error and Firing Error off when you want the crosshair to remain consistent while moving and shooting.
A beginner-friendly setup could use a thickness of 1 or 2, a small center gap, and short inner lines. Outlines can improve visibility, but heavy outlines may make the design feel larger than necessary.
Avoid oversized circles, complicated animations, and crosshairs that blend into ability effects. Your crosshair should provide a clear reference point, not become the most noticeable object on the screen.
Check Raw Mouse Input and Polling Rate
VALORANT has used raw mouse input since launch, which helps the game process mouse movement directly. Riot previously offered a Raw Input Buffer option, especially useful for high-polling-rate devices.
However, Riot removed the configurable RawInputBuffer setting in Patch 11.06. It is now enabled automatically for all players because Riot found it to be the more performant option. Therefore, current players do not need to search for or manually activate this setting.
A polling rate of 1,000 Hz is a reliable choice for most gaming mice. Higher rates such as 4,000 Hz or 8,000 Hz can provide more frequent input updates, but they may increase CPU usage. Test them carefully rather than assuming the largest number is always better.
Test Settings in Real Gameplay
Do not judge performance only by standing still in the Practice Range. Test gunfights, ability effects, crowded sites, and quick turns because those situations place different loads on the system.
Enable VALORANT’s client FPS and frame-time statistics while testing. Look for stability rather than chasing one unusually high result.
Change one setting at a time. When you lower every option, update drivers, change sensitivity, and rebuild your crosshair simultaneously, you will not know which adjustment actually helped.
Riot’s official high-end target for 144 FPS or more lists an Intel Core i5-9400F or AMD Ryzen 5 2600X alongside a GTX 1050 Ti, Radeon R7 370, or Intel Arc A310. Real match performance can still vary depending on background software, temperature, memory configuration, and game updates.
The best Valorant settings for maximum FPS and better aim focus on three things: stable frame delivery, low latency, and clear visual information.
Use Fullscreen mode, enable Multithreaded Rendering, lower unnecessary graphics effects, turn off VSync for competitive play, and activate NVIDIA Reflex on supported hardware.
For aiming, begin with a moderate eDPI, a simple static crosshair, and a sensitivity you can use consistently. Do not copy every professional setting without testing whether it suits your equipment and movement style.
Apply the recommended setup, enter the Practice Range, and record your FPS and aiming comfort. Make small adjustments over several sessions, then keep the configuration that feels reliable during real matches – not merely the one that produces the biggest number in the menu.