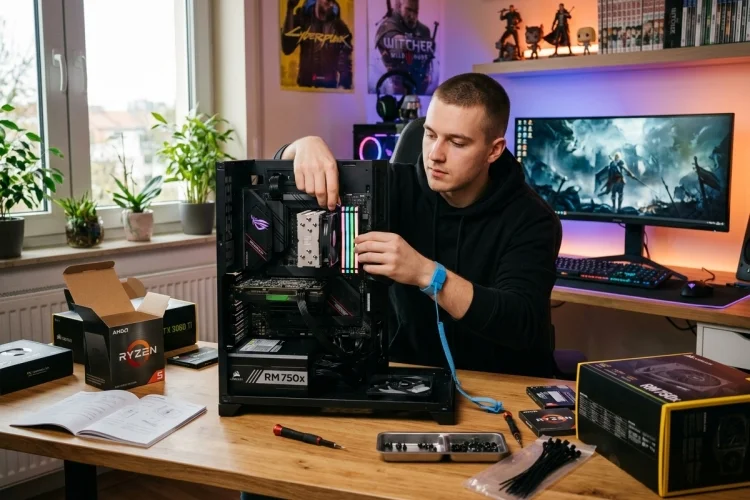
Building your own gaming PC can look intimidating when every component arrives in a separate box. There are delicate CPU pins, tiny motherboard headers, several power cables, and enough technical terms to make a first-time builder reconsider the entire project.
The process is much more manageable when you treat it as a series of small tasks. Most modern components fit into only one type of connector, and manufacturers provide diagrams showing where each cable, screw, and module belongs.
The key is to work slowly, check compatibility before starting, and never force a component into place. This guide explains how to build a gaming PC step by step, from preparing the motherboard to installing Windows and testing the finished system.
The exact layout will vary between cases and motherboards, so keep the manuals nearby throughout the build.
By the end, you will understand what each major component does, how everything connects, and what to check when the PC does not start perfectly on the first attempt.
Before You Start: Check Parts and Prepare Your Workspace
A typical gaming PC requires a processor, CPU cooler, motherboard, memory, storage, graphics card, power supply, and case. You will also need an operating system, monitor, keyboard, and mouse.
Compatibility matters more than brand. The CPU must match the motherboard socket and chipset, while the memory must use the correct DDR generation. Your case needs to support the motherboard size, graphics-card length, cooler height, and radiator size.
Check the motherboard’s CPU support list and memory Qualified Vendor List before ordering. A QVL shows combinations the manufacturer has tested for stability, although other compatible memory kits may also work.
Your workspace should be clean, bright, and free from unnecessary clutter. Avoid working on carpet, keep drinks away, and place the motherboard on its cardboard box rather than directly on a hard surface.
A magnetic Phillips-head screwdriver, cable ties, thermal paste when it is not already applied, and a USB flash drive for Windows are usually enough. Intel’s official guide also recommends organizing screws and consulting each component manual throughout the process.
Step 1: Install the CPU, RAM, SSD, and Cooler
It is usually easier to install the smaller motherboard components before placing the board inside the case.
1. Install the Processor
Open the CPU socket by releasing its retention mechanism. Find the small triangle or alignment marker on the processor and match it with the corresponding marker on the socket.
Lower the CPU gently into position. It should sit correctly without pressure, so never push, twist, or slide it across the socket. Close the retention mechanism once the processor is properly aligned.
Installation details differ between AMD and Intel sockets, especially because contact pins may be located on either the processor or motherboard.
Follow the instructions for your exact platform rather than relying only on a general video. AMD provides separate installation guidance for its supported Ryzen socket designs.
2. Install the Memory
Open the clips on the recommended RAM slots and align each module with the notch in the slot. Press down evenly until the module clicks into place.
When using two sticks on a four-slot board, the recommended positions are often A2 and B2, but this is not universal.
Check the motherboard manual because using the wrong pair may prevent dual-channel operation or cause stability problems. Kingston recommends confirming slot placement and applying even pressure during installation.
3. Install the M.2 SSD
Remove the M.2 heatsink when your motherboard includes one. Insert the SSD into the correct slot at a slight angle, lower it carefully, and secure it with the supplied screw or tool-free latch.
Use the motherboard’s primary CPU-connected M.2 slot when recommended. Some slots may share bandwidth with SATA ports or support different PCIe generations, so the manual remains important.
Crucial’s official instructions show the angled insertion and securing process used by standard NVMe drives.
4. Attach the CPU Cooler
Remove any protective plastic covering the cooler’s contact surface. When thermal paste is already applied, do not add another layer. Otherwise, use the amount and method recommended by the cooler manufacturer.
Position the cooler over the CPU and tighten its screws gradually in a diagonal pattern. Connect the fan cable to the motherboard header labeled CPU_FAN. Larger air coolers and liquid-cooling radiators may be easier to mount after checking case clearance.
Step 2: Prepare the Case and Mount the Motherboard
Remove both side panels and lay the case flat. Check that the motherboard standoffs match your board’s size, such as ATX, Micro-ATX, or Mini-ITX.
Do not leave an extra standoff beneath an area without a motherboard screw hole. An incorrectly placed metal standoff can contact the back of the board and potentially cause a short.
Install the separate rear I/O shield when your motherboard does not have one built in. Lower the board into the case, align its ports with the rear opening, and position its screw holes over the standoffs.
Insert the motherboard screws and tighten them until secure, but do not overtighten. The board should remain flat without bending.
At this stage, you can also install case fans or a liquid-cooling radiator. A common airflow layout uses front or bottom fans as intake and rear or top fans as exhaust, although the ideal arrangement depends on the case design.
Step 3: Install the Power Supply and Route Its Cables
Position the power supply in its compartment with the fan facing a filtered ventilation opening when available. When the case has no lower vent, the fan may need to face upward into the case.
For a modular PSU, connect the required cables before the compartment becomes crowded. Most gaming builds need a 24-pin motherboard cable, one or more CPU EPS cables, graphics-card power, and possibly SATA power for drives, fan hubs, or lighting controllers.
Never reuse random modular cables from another power supply. The connectors may physically fit while using a different pin arrangement, which can damage components. Modular cables are specific to compatible PSU families and should only be used when the manufacturer confirms compatibility.
Secure the power supply using the provided case or PSU screws. Corsair’s installation guidance also warns users not to open the PSU enclosure because it contains no user-serviceable internal components.
Route the 24-pin cable to the motherboard’s main power connector and the CPU power cable toward the top-left area of the board. The CPU connector is easy to forget and is one of the most common reasons a newly assembled PC appears to power on without booting.
Step 4: Install the Graphics Card and Finish the Connections
Remove the correct expansion-slot covers from the back of the case. Release the latch on the motherboard’s main PCIe x16 slot, which is usually the long slot closest to the CPU.
Align the graphics card with the slot and rear opening, then press it down evenly until the latch clicks. Secure the card to the case with screws and attach a support bracket when the model is especially long or heavy.
Intel recommends aligning the GPU with both the PCIe slot and rear retention area before pressing it into place.
Connect the graphics-card power cable exactly as shown in the GPU and PSU manuals. High-power cards may use traditional PCIe connectors or a newer compact connector that must be inserted completely and routed without a sharp bend near the plug.
Next, connect the case power button, reset switch, status LEDs, front USB ports, USB-C port, and front audio cable. The front-panel connectors are small and easy to confuse, so use the motherboard diagram rather than guessing.
Connect case fans to appropriate motherboard headers or a powered hub. Finish by checking the 24-pin motherboard, CPU EPS, GPU power, CPU fan, and storage connections.
Step 5: Perform the First Boot and Configure the BIOS
Connect the monitor to the graphics card rather than the motherboard when using a dedicated GPU. Attach the keyboard, plug in the power cable, switch the PSU on, and press the case power button.
The first startup can take longer than expected, particularly on systems performing initial memory training. Give the machine time before assuming something is wrong.
Enter the BIOS by pressing the key shown during startup, commonly Delete or F2. Confirm that the processor, total memory, storage drive, and CPU temperature appear correctly.
Start with default settings and confirm that the system is stable. You can then enable the appropriate XMP or EXPO memory profile so the RAM runs at its advertised configuration instead of its basic default speed.
A BIOS update may be useful for processor support, memory compatibility, security fixes, or stability improvements. Follow the exact instructions provided by the motherboard manufacturer and never interrupt power during an update.
ASUS recommends checking CPU and memory support information and using a current BIOS when resolving compatibility issues.
When the PC does not boot, recheck the CPU power cable, RAM seating, monitor input, GPU connection, and motherboard diagnostic lights before removing every component.
Step 6: Install Windows, Drivers, and Test the System
Use another computer to create a bootable Windows installation USB. Microsoft provides an official Media Creation Tool for installing a clean copy of Windows on a new PC.
Insert the USB drive, select it from the BIOS boot menu, and follow the installation prompts. Choose your new SSD as the destination and allow the setup process to create the required partitions.
After reaching the desktop, install Windows updates followed by the motherboard chipset, network, audio, and graphics drivers. Download drivers directly from the motherboard, AMD, Intel, or NVIDIA websites rather than depending on unofficial driver utilities.
Check Device Manager for missing hardware and confirm that the monitor is running at its maximum refresh rate. Install a hardware-monitoring tool and observe CPU and GPU temperatures during several games.
Run a few stability tests before spending hours on cable management. When the system is stable, shut it down, unplug the power, organize the cables behind the motherboard tray, and replace the side panels.
Learning how to build a gaming PC step by step becomes much easier when you follow a logical order.
Begin by confirming compatibility, then install the CPU, RAM, SSD, and cooler on the motherboard. Mount the board, add the power supply and graphics card, complete the cables, and check every connection before the first boot.
Once the hardware starts successfully, configure the BIOS, install Windows and official drivers, and test temperatures and stability. Do not rush or force a component when something feels wrong – the manual usually provides the answer.
Prepare your workspace, place every component within reach, and complete one stage at a time. Building your first gaming PC may feel challenging, but pressing the power button and seeing your custom system come alive makes the effort worthwhile.